latest WW2 ruleset Chain of Command, I actually bought a copy at the recent Warfare show ... and then, against my better judgement but in a rather inevitable development as well I had a last-minute splurge on a whole packet of
.
This means I now have US WW2 infantry in 10mm, 15mm and 20mm for three different rulesets at battalion, company and platoon level, but hey, who's counting...
When I got home I also dug out my old (very old...) collection of plastic WW2 figures, which have rather been confined to "
no, you can't touch those soldiers, but how about playing with these ones instead...?" duties and managed to find a handful of very old
Matchbox US infantry who looked to be a very similar size and stature to widen the range of poses in the unit.
So far I've assembled and based up a platoon and a bit, and painted 4 figures as a test run - here are the results (each image can be clicked to show you a bigger version).
PSC infantry, painted and unpainted. The figures were first based (on UK Government-issue washers, the small brown ones that come without the holes and cost a penny each..) and undercoated in Army Painter Leather Brown (it comes in a spray can too, which I plan to use for the complete platoon, but it wasn't worth using for this test).
The figures were painted using the guide on the back of the box, but with the closest colours I had to hand rather than the specific Vallejo paints they suggested. The trousers are just the base coat. As you can just about see here, some of the PSC figures come with separate arms which you need to glue into place. This can entail a little bit of filling of gaps along the way, but it does mean that the figure poses can carry their rifles away from their bodies.

The jacket is painted in Coat d'arms 537 Faded Khaki (sold by Black Hat) instead of the Vallejo 884 Stone Grey suggested on the box. In these photos you can also clearly see one of the odd things about these figures - the Y-shaped webbing braces on the back of each figure. I'm no rivet-counter, so I may be wrong on this but as far as I know this style was a German thing, with allied troops having more traditional over-the-shoulder parallel braces or fully crossed-over ones. It would be interesting to see if the German figures from this range have the same poses, as perhaps the bodies have been "recycled" ?!
The webbing and gaiters are in Coat d'arms 228 Buff - the box art suggested Vallejo 976 Buff, but having looked at an
online comparison chart on dakkadakka this may be a bit yellow (which is what I'd thought anyway), as the far whiter "Bleached Bone" GW colour is suggested as an alternative to Vallejo Buff.
FWIW Coat d'arms Buff is a great colour for ECW-era troops, and takes an ink wash or Armypainter varnish stain really well. For the bases this is the first time I've actually tried making a "gunk" out of sand and glue, and it is a little better to then drybrush than just glued-down sand. But a lot more effort!
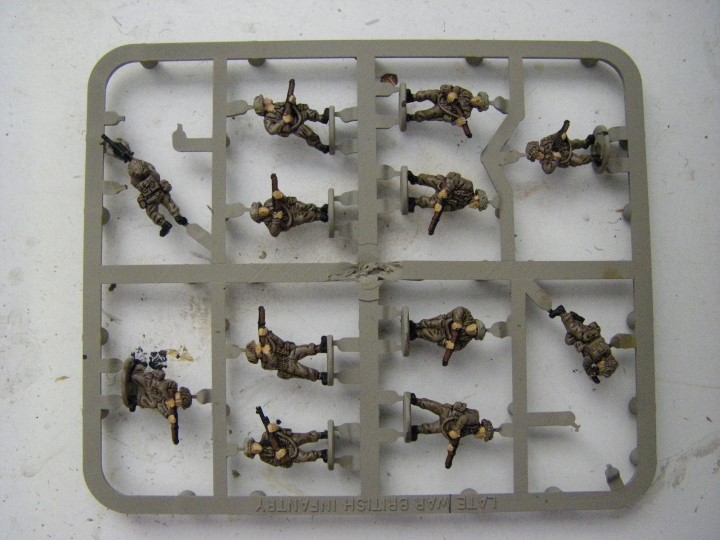
The standing rifleman - although this chap is doing a slightly uncomfortable looking "advance" - which is easier to spot in the next photo. This was again a figure with separate arms, however about half the figures in the pack are single piece castings. Surprisingly (given my experience with Warlord Games 28mm ECW plastics) the arms do not mix-and-match across the bodies, and there are only enough arms on the sprue to equip (or maybe "arm") all of the figures.
I would have thought it might have been possible to provide some more variety by having more arms than bodies, or some more loose kit (or separate arms!) to glue onto the figures, or even make some of the poses interchangeable - especially as it sounds like PSC do exactly this with their AFV kits, with enough bits included to produce several variants on each sprue. I did try to mix some of them up, but the arms seem pretty unforgiving in the way they match to each body, so it would involve more cutting and filling than I am prepared to do to achieve this sort of more mixed look.

The helmets were painted with an old stalwart which now has a new name - GW Castellan Green, formerly known as Catchacan Green. I did fill the joints between the arms and the body on the painted model, but I may just rely on paint to do the job on most of the rest as they mostly fit together pretty well, with a few exceptions where filler is needed. Around half of the figures on the sprue have separate arms, the rest are one piece castings.

The box art suggested Vallejo 887 Brown Violet for the helmet, but I am a big fan of making US WW2 helmets look more, well, "green". Not sure why, it just feels more right (and helps differentiates them more from British figures too from a distance). You can see from the helmet on this guy that the level of raised detail on the unpainted figure (who has netting cast onto his helmet) does struggle to make it through two coats of paint and two of varnish and the same is true of some other areas on the figures, especially the webbing, where a little more relief in the casting/moulding might have been helpful to painters like me. .
Hands and face were a one-coat of Vallejo 019 Dark Flesh - it always seems a little pale to me, and maybe the box suggestion of 815 Basic Skin Tone is darker? As well as shooting and advancing riflemen the sprue contains a number of officers, one casualty and (I think) a medic.
The ratio of officers (or more accurately, blokes using radios or holding binoculars) to "men doing stuff" seems a little high, although with 50-odd figures in the box there is clearly plenty of scope to make a decent platoon and have a bit of attrition along the way. Maybe another reason why having more "arms" on the sprue, so some of the officers could have been demoted to riflemen, would have been useful?
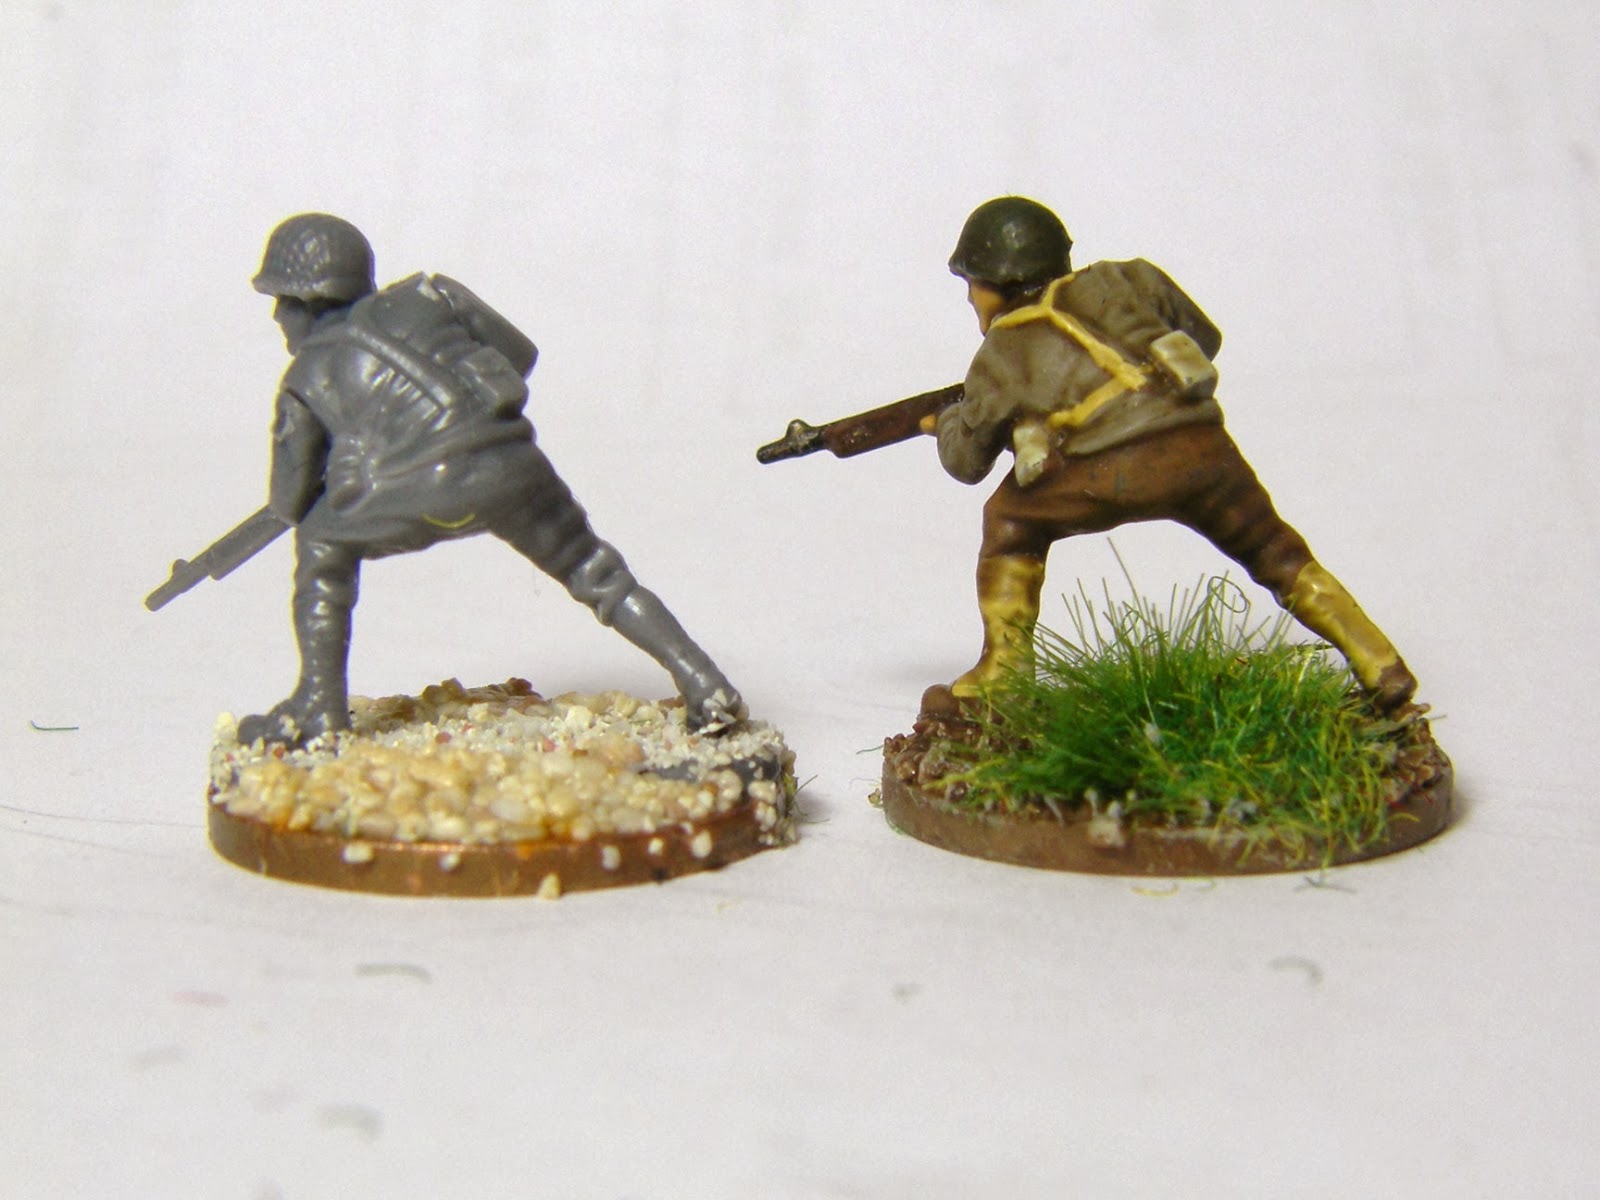
The two PSC figures are here on the left, with the Matchbox ones on the right. The officer's coat is Coat d'arms 215 Leather Brown - not sure if this is historical but I guess an officer could rustle up whatever he liked really...and the colour is one I know from my ECW figures really takes a Darktone varnish very well.
Gun stocks were all painted in Coat d'arms 235 Horse Tone Brown, with black + gunmetal drybrushed metalwork. Plastic Soldier Review suggests that the Matchbox figures are 21mm high and the PSC ones are 24mm high, but I can't really see quite that much difference on the tabletop myself - can you?
Finally, they were painted in ArmyPainter Quickshade Dark Tone, (including the base) and Testors Dullcot'ed. The bases were drybrushed in Bleached Bone and then light grey, with Silfor tufts and some static grass added at the end of the process.
Not too bad for a quick and dirty paint job I reckon... now, I just have to actually find some decent weather to spray the rest, time to paint them and somehow time, space and terrain to play an actual game!
Here's a set of photos of the whole lot being painted (which I've added to this post later on).
The in-the-plastic set. I've used nearly all of the 3 sprues, and tried to swap a couple of arms around, with limited success it must be said..
Undercoated, and with the Faded Khaki done.
Flesh painted...
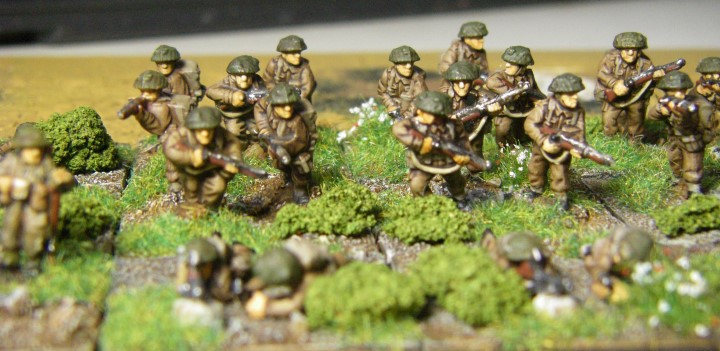
...and now I've finally finished them - see some
more photos of the finished unit here 


 and a handful of Battlefront carriers to paint, I thought I'd give it a go.


 .
.